NextCloud Serverシステム要件
System Requirementを参照してください。
PHPのバージョンは7.xが必須のようです。
CentOS7の場合は、PHP 5.xだったと思いますのでPHP 7.xにするには一旦アンインストールして入れなおすか、phpbrewなどで複数バージョンを使用するかになると思います。私は切り替えが面倒なのでPHP 7.1にしています。
インストールの準備
インストール方法は「Example installation on CentOS 7 server」を参考に行いました。
当サーバは、以下の構成です。
※インストールに必要なリポジトリの登録は「LIVAX ソフトウェア構成 1811」に記載してあります。
ダウンロード
公式サイトからダウンロードします。
ダウンロードするのは「Get NextCloud Server」です。
2018年11月現在の最新バージョンは14.03です。
CentOS7.5にインストールするので「tar.bz2」をダウンロードしました。
ダウンロードサイトから最新バージョンのNextcloudをダウンロードします。
$ cd /home
$ wget https://download.nextcloud.com/server/releases/nextcloud-14.0.3.tar.bz2
ダウンロードしたファイルを解凍します。
$ tar jxvf nextcloud-14.0.3.tar.bz2ディレクトリのパーミッション設定
# chown -R nginx:webadmin nextcloud
# find nextcloud/ -type d -exec chmod 750 {} ;
# find nextcloud/ -type f -exec chmod 640 {} ;
SELinuxに関する設定
# semanage fcontext -a -t httpd_sys_rw_content_t '/home/nextcloud/data(/.*)?'
# semanage fcontext -a -t httpd_sys_rw_content_t '/home/nextcloud/config(/.*)?'
# semanage fcontext -a -t httpd_sys_rw_content_t '/home/nextcloud/apps(/.*)?'
# semanage fcontext -a -t httpd_sys_rw_content_t '/home/nextcloud/.htaccess'
# semanage fcontext -a -t httpd_sys_rw_content_t '/home/nextcloud/.user.ini'
# semanage fcontext -a -t httpd_sys_rw_content_t '/home/nextcloud/3rdparty/aws/aws-sdk-php/src/data/logs(/.*)?'
# restorecon -Rv '/home/nextcloud/'
/var/log/audit/audit.logや/var/log/messagesにSELinux関連のエラーが出力されていればそれに対応して処置をしてください。
PHPのインストール
マニュアルではPHPはwebtatic-releaseのPHP 7.2を導入していますが、現在であればremiレポジトリのもので大丈夫です。
それぞれPHPライブラリは必要なものをインストールしてください。
# yum install --enablerepo=remi,remi-php71 php php-mysql php-mbstring php-intl php-mcrypt php-imagick php-xml php-zip php-process php-apcu php-gd php-opcachephp.iniの編集
デフォルトのままでもよいものもありますが、一応関係しそうな一般的な設定のみ記述しています。
※php-fpm、nginx、nextcloud、phpmyadminなどCGI、WEBサーバ、アプリ側でも変更が必要な場合があります。
※netxcloudはインストールディレクトリ直下の.user.iniで上書きできるのでnextcloudに関する要件はできるだけそちらに記述します。
※デフォルトのphp.iniを編集せずに/etc/php.dに新たにxxx.iniを作成して記述してもよいと思います。
; 文字コードに関する内容
default_charset = UTF-8
mbstring.language = Japanese
mbstring.encoding_translation = Off
mbstring.detect_order = UTF-8,SJIS,EUC-JP,JIS,ASCII
date.timezone = Asia/Tokyo
; 以下はPHP5.6以降で非推奨になっているのでコメントアウトしておく
;mbstring.internal_encoding =
;mbstring.http_input =
;mbstring.http_output =

;アップロードファイルサイズ関連
memory_limit = 128M
post_max_size = 128M
upload_max_filesize = 128M

;応答待ち時間
max_execution_time = 300
;max_input_time = -1

; エラー表示
display_errors = Off
; エラーログ
log_errors=On
error_log = /var/log/php_error.log

;セキュリティ関連
expose_php = Off
allow_url_fopen=Off
allow_url_include=Off
;セッションID生成コード
session.sid_length = 32
session.sid_bits_per_character = 5
;セッションIDをURLに表示しない設定※絶対変えるな
session.use_trans_sid=0
session.use_cookies = 1
session.use_only_cookies = 1
session.cookie_httponly = 1
php-fpmのインストール
# yum install --enablerepo=remi,remi-php71 php-fpm/etc/php-fpm.d/www.confの編集
※nextcloudのマニュアルを参考にしています。
[www]

user = nginx
group = nginx

listen = /var/run/php-fpm/$pool.sock
listen.mode = 0660
listen.owner = nginx
listen.group = webadmin
listen.backlog = -1
listen.acl_users = apache,nginx
listen.allowed_clients = 127.0.0.1

catch_workers_output = yes

pm = dynamic
pm.max_children = 50
pm.start_servers = 3
pm.min_spare_servers = 1
pm.max_spare_servers = 8
access.log = /var/log/php-fpm/access.log
access.format = "%R - %u %t "%m %r%Q%q" %s %f %{mili}d %{kilo}M %C%%"
slowlog = /var/log/php-fpm/$pool-slow.log

clear_env = no

env[HOSTNAME] = $HOSTNAME
env[PATH] = /usr/local/sbin:/usr/local/bin:/sbin:/bin:/usr/sbin:/usr/bin
env[TMP] = /tmp
env[TMPDIR] = /tmp
env[TEMP] = /tmp

php_flag[display_errors] = off
php_admin_value[error_log] = /var/log/php-fpm/$pool-error.log
php_admin_flag[log_errors] = on
php_admin_value[memory_limit] = 128M

php_value[session.save_handler] = files
php_value[session.save_path]    = /var/lib/php/session
php_value[soap.wsdl_cache_dir]  = /var/lib/php/wsdlcache
php_value[opcache.file_cache]  = /var/lib/php/opcache

request_terminate_timeout = 300
/var/lib/php以下のオーナー変更
# cd /var/lib/php
# chown -R root:nginx *
/etc/php-fpm.confのチェック
# php-fpm -t
[16-Nov-2018 01:17:15] NOTICE: configuration file /etc/php-fpm.conf test is successful
php-fpmサービスの有効化
# systemctl enable php-fpmphp-fpmサービスの起動
# systemctl start php-fpmNginxのインストール
# yum install nginxsites-enabledの作成
CentOSではconf.dを使用するようになっていますが、他のディストリビューションの良いところを真似してsites-enabledを作成します。
この中にあるXXXX.confはconf.dへのソフトリンクにしています。
conf.d/XXX.confは実際に使っていない設定ファイルでも保管できます。
使用する設定ファイルのみsites-enabledにソフトリンクを作成します。
/etc/nginx/conf.d/nextcloud.confの作成
upstream php-handler {
    #server 127.0.0.1:9000;
    server unix:/var/run/php-fpm/www.sock;
}

server {
    listen 80;
    listen [::]:80;
    server_name cloud.example.com;
    # enforce https
    return 301 https://$server_name$request_uri;
}

server {
    listen 443 ssl http2;
    listen [::]:443 ssl http2;
    server_name cloud.example.com;

    # Use Mozilla's guidelines for SSL/TLS settings
    # https://mozilla.github.io/server-side-tls/ssl-config-generator/
    # NOTE: some settings below might be redundant
    ssl_certificate /etc/ssl/nginx/cloud.example.com.crt;
    ssl_certificate_key /etc/ssl/nginx/cloud.example.com.key;

    # Add headers to serve security related headers
    # Before enabling Strict-Transport-Security headers please read into this
    # topic first.
    # add_header Strict-Transport-Security "max-age=15768000;
    # includeSubDomains; preload;";
    #
    # WARNING: Only add the preload option once you read about
    # the consequences in https://hstspreload.org/. This option
    # will add the domain to a hardcoded list that is shipped
    # in all major browsers and getting removed from this list
    # could take several months.
    add_header X-Content-Type-Options nosniff;
    add_header X-XSS-Protection "1; mode=block";
    add_header X-Robots-Tag none;
    add_header X-Download-Options noopen;
    add_header X-Permitted-Cross-Domain-Policies none;
    add_header Referrer-Policy no-referrer;

    # Remove X-Powered-By, which is an information leak
    fastcgi_hide_header X-Powered-By;

    # Remove X-Powered-By, which is an information leak
    fastcgi_hide_header X-Powered-By;

    # Path to the root of your installation
    root /home/nextcloud/;

    location = /robots.txt {
        allow all;
        log_not_found off;
        access_log off;
    }

    # The following 2 rules are only needed for the user_webfinger app.
    # Uncomment it if you're planning to use this app.
    #rewrite ^/.well-known/host-meta /public.php?service=host-meta last;
    #rewrite ^/.well-known/host-meta.json /public.php?service=host-meta-json
    # last;

    location = /.well-known/carddav {
      return 301 $scheme://$host/remote.php/dav;
    }
    location = /.well-known/caldav {
      return 301 $scheme://$host/remote.php/dav;
    }

    # set max upload size
    client_max_body_size 512M;
    fastcgi_buffers 64 4K;

    # Enable gzip but do not remove ETag headers
    gzip on;
    gzip_vary on;
    gzip_comp_level 4;
    gzip_min_length 256;
    gzip_proxied expired no-cache no-store private no_last_modified no_etag auth;
    gzip_types application/atom+xml application/javascript application/json application/ld+json application/manifest+json application/rss+xml application/vnd.geo+json application/vnd.ms-fontobject application/x-font-ttf application/x-web-app-manifest+json application/xhtml+xml application/xml font/opentype image/bmp image/svg+xml image/x-icon text/cache-manifest text/css text/plain text/vcard text/vnd.rim.location.xloc text/vtt text/x-component text/x-cross-domain-policy;

    # Uncomment if your server is build with the ngx_pagespeed module
    # This module is currently not supported.
    #pagespeed off;

    location / {
        rewrite ^ /index.php$request_uri;
    }

    location ~ ^/(?:build|tests|config|lib|3rdparty|templates|data)/ {
        deny all;
    }
    location ~ ^/(?:.|autotest|occ|issue|indie|db_|console) {
        deny all;
    }

    location ~ ^/(?:index|remote|public|cron|core/ajax/update|status|ocs/v[12]|updater/.+|ocs-provider/.+).php(?:$|/) {
        fastcgi_split_path_info ^(.+?.php)(/.*)$;
        include fastcgi_params;
        fastcgi_param SCRIPT_FILENAME $document_root$fastcgi_script_name;
        fastcgi_param PATH_INFO $fastcgi_path_info;
        fastcgi_param HTTPS on;
        #Avoid sending the security headers twice
        fastcgi_param modHeadersAvailable true;
        fastcgi_param front_controller_active true;
        fastcgi_pass php-handler;
        fastcgi_intercept_errors on;
        fastcgi_request_buffering off;
        fastcgi_read_timeout 300;
    }

    location ~ ^/(?:updater|ocs-provider)(?:$|/) {
        try_files $uri/ =404;
        index index.php;
    }

    # Adding the cache control header for js and css files
    # Make sure it is BELOW the PHP block
    location ~ .(?:css|js|woff|svg|gif)$ {
        try_files $uri /index.php$request_uri;
        add_header Cache-Control "public, max-age=15778463";
        # Add headers to serve security related headers (It is intended to
        # have those duplicated to the ones above)
        # Before enabling Strict-Transport-Security headers please read into
        # this topic first.
        # add_header Strict-Transport-Security "max-age=15768000; includeSubDomains; preload;";
        #
        # WARNING: Only add the preload option once you read about
        # the consequences in https://hstspreload.org/. This option
        # will add the domain to a hardcoded list that is shipped
        # in all major browsers and getting removed from this list
        # could take several months.
        add_header X-Content-Type-Options nosniff;
        add_header X-XSS-Protection "1; mode=block";
        add_header X-Robots-Tag none;
        add_header X-Download-Options noopen;
        add_header X-Permitted-Cross-Domain-Policies none;
        add_header Referrer-Policy no-referrer;

        # Optional: Don't log access to assets
        access_log off;
    }

    location ~ .(?:png|html|ttf|ico|jpg|jpeg)$ {
        try_files $uri /index.php$request_uri;
        # Optional: Don't log access to other assets
        access_log off;
    }
}
/etc/nginx/sites-enabled/nextcloud.confのソフトリンクを作成
# ln -s /etc/nginx/conf.d/nextcloud.conf /etc/nignx/sites-enabled/nextcloud.conf /etc/nginx/nginx.confの編集
sites-enabledディレクトリから設定ファイルを読み込むようにinclude文を編集しています。
user  nginx;
worker_processes  auto;

#error_log  /var/log/nginx/error.log warn;
error_log  /var/log/nginx/error.log debug;
pid        /var/run/nginx.pid;


events {
    worker_connections  1024;
}


http {
    include       /etc/nginx/mime.types;
    default_type  application/octet-stream;

    log_format  main  '$remote_addr - $remote_user [$time_local] "$request" '
                      '$status $body_bytes_sent "$http_referer" '
                      '"$http_user_agent" "$http_x_forwarded_for"';

    access_log  /var/log/nginx/access.log  main;

    sendfile        on;
    #tcp_nopush     on;

    keepalive_timeout  65;

    #gzip  on;


    include /etc/nginx/sites-enabled/*.conf;
}
設定ファイルの文法チェック
# nginx -t
nginx: the configuration file /etc/nginx/nginx.conf syntax is ok
nginx: configuration file /etc/nginx/nginx.conf test is successful
nginxサービスの有効化
# sysstemctl enable nginxnginxサービスの開始
# systemctl start nginxMariaDBのインストール
# yum install MariaDB-server MariaDB-client初期設定
# mysql_secure_installation

NOTE: RUNNING ALL PARTS OF THIS SCRIPT IS RECOMMENDED FOR ALL MariaDB
      SERVERS IN PRODUCTION USE!  PLEASE READ EACH STEP CAREFULLY!

In order to log into MariaDB to secure it, we'll need the current
password for the root user.  If you've just installed MariaDB, and
you haven't set the root password yet, the password will be blank,
so you should just press enter here.

Enter current password for root (enter for none):
OK, successfully used password, moving on...

Setting the root password ensures that nobody can log into the MariaDB
root user without the proper authorisation.

Set root password? [Y/n] y
New password:
Re-enter new password:
Password updated successfully!
Reloading privilege tables..
 ... Success!


By default, a MariaDB installation has an anonymous user, allowing anyone
to log into MariaDB without having to have a user account created for
them.  This is intended only for testing, and to make the installation
go a bit smoother.  You should remove them before moving into a
production environment.

Remove anonymous users? [Y/n] y
 ... Success!

Normally, root should only be allowed to connect from 'localhost'.  This
ensures that someone cannot guess at the root password from the network.

Disallow root login remotely? [Y/n]
 ... Success!

By default, MariaDB comes with a database named 'test' that anyone can
access.  This is also intended only for testing, and should be removed
before moving into a production environment.

Remove test database and access to it? [Y/n]
 - Dropping test database...
 ... Success!
 - Removing privileges on test database...
 ... Success!

Reloading the privilege tables will ensure that all changes made so far
will take effect immediately.

Reload privilege tables now? [Y/n]
 ... Success!

Cleaning up...

All done!  If you've completed all of the above steps, your MariaDB
installation should now be secure.

Thanks for using MariaDB!
/etc/my.cnfの編集
# Example MariaDB config file for medium systems.
#
# This is for a system with little memory (32M - 64M) where MariaDB plays
# an important part, or systems up to 128M where MariaDB is used together with
# other programs (such as a web server)
#
# MariaDB programs look for option files in a set of
# locations which depend on the deployment platform.
# You can copy this option file to one of those
# locations. For information about these locations, do:
# 'my_print_defaults --help' and see what is printed under
# Default options are read from the following files in the given order:
# More information at: http://dev.mysql.com/doc/mysql/en/option-files.html
#
# In this file, you can use all long options that a program supports.
# If you want to know which options a program supports, run the program
# with the "--help" option.

# The following options will be passed to all MariaDB clients
[client]
#password       = your_password
port            = 3306
socket          = /var/lib/mysql/mysql.sock
default-character-set = utf8mb4

# Here follows entries for some specific programs

# The MariaDB server
[mysqld]
character-set-server = utf8mb4
port            = 3306
socket          = /var/lib/mysql/mysql.sock
skip-external-locking
key_buffer_size = 384M
max_allowed_packet = 64M
table_open_cache = 4096
sort_buffer_size = 2M
net_buffer_length = 8K
read_buffer_size = 2M
read_rnd_buffer_size = 64M
myisam_sort_buffer_size = 64M
thread_cache_size = 8
query_cache_size = 32M
feedback=ON

# Point the following paths to different dedicated disks
#tmpdir         = /tmp/

# Don't listen on a TCP/IP port at all. This can be a security enhancement,
# if all processes that need to connect to mysqld run on the same host.
# All interaction with mysqld must be made via Unix sockets or named pipes.
# Note that using this option without enabling named pipes on Windows
# (via the "enable-named-pipe" option) will render mysqld useless!
#
#skip-networking

# Replication Master Server (default)
# binary logging is required for replication
log-bin=mysql-bin
expire_logs_days=30

# binary logging format - mixed recommended
binlog_format=mixed

# required unique id between 1 and 2^32 - 1
# defaults to 1 if master-host is not set
# but will not function as a master if omitted
server-id       = 1

# Replication Slave (comment out master section to use this)
#
# To configure this host as a replication slave, you can choose between
# two methods :
#
# 1) Use the CHANGE MASTER TO command (fully described in our manual) -
#    the syntax is:
#
#    CHANGE MASTER TO MASTER_HOST=<host>, MASTER_PORT=<port>,
#    MASTER_USER=<user>, MASTER_PASSWORD=<password> ;
#
#    where you replace <host>, <user>, <password> by quoted strings and
#    <port> by the master's port number (3306 by default).
#
#    Example:
#
#    CHANGE MASTER TO MASTER_HOST='125.564.12.1', MASTER_PORT=3306,
#    MASTER_USER='joe', MASTER_PASSWORD='secret';
#
# OR
#
# 2) Set the variables below. However, in case you choose this method, then
#    start replication for the first time (even unsuccessfully, for example
#    if you mistyped the password in master-password and the slave fails to
#    connect), the slave will create a master.info file, and any later
#    change in this file to the variables' values below will be ignored and
#    overridden by the content of the master.info file, unless you shutdown
#    the slave server, delete master.info and restart the slaver server.
#    For that reason, you may want to leave the lines below untouched
#    (commented) and instead use CHANGE MASTER TO (see above)
#
# required unique id between 2 and 2^32 - 1
# (and different from the master)
# defaults to 2 if master-host is set
# but will not function as a slave if omitted
#server-id       = 2
#
# The replication master for this slave - required
#master-host     =   <hostname>
#
# The username the slave will use for authentication when connecting
# to the master - required
#master-user     =   <username>
#
# The password the slave will authenticate with when connecting to
# the master - required
#master-password =   <password>
#
# The port the master is listening on.
# optional - defaults to 3306
#master-port     =  <port>
#
# binary logging - not required for slaves, but recommended
#log-bin=mysql-bin

# Uncomment the following if you are using InnoDB tables
innodb_data_home_dir = /var/lib/mysql
innodb_data_file_path = ibdata1:10M:autoextend
innodb_log_group_home_dir = /var/lib/mysql
# You can set .._buffer_pool_size up to 50 - 80 %
# of RAM but beware of setting memory usage too high
innodb_buffer_pool_size = 384M
#innodb_additional_mem_pool_size = 20M
# Set .._log_file_size to 25 % of buffer pool size
innodb_log_file_size = 10M
innodb_log_buffer_size = 64M
innodb_flush_log_at_trx_commit = 1
innodb_lock_wait_timeout = 180

[mysqldump]
quick
max_allowed_packet = 16M

[mysql]
no-auto-rehash
# Remove the next comment character if you are not familiar with SQL
#safe-updates

[myisamchk]
key_buffer_size = 20M
sort_buffer_size = 20M
read_buffer = 2M
write_buffer = 2M

[mysqlhotcopy]
interactive-timeout
Mariadbサービスの有効化
# systemctl enable mariadbMariadbサービスの起動
# systemctl start mariadbNextcloud用データベースとデータベース管理ユーザの作成
作成するデータベース名と管理ユーザおよびパスワードは、NextCloudインストール情報の表を参照してください。
# mysql -u root -p
Enter password:
Welcome to the MariaDB monitor.  Commands end with ; or g.
Your MariaDB connection id is 4
Server version: 10.2.19-MariaDB MariaDB Server

Copyright (c) 2000, 2016, Oracle, MariaDB Corporation Ab and others.

Type 'help;' or 'h' for help. Type 'c' to clear the current input statement.

MariaDB [(none)]> create database nextcloud;
Query OK, 1 row affected (0.00 sec)

MariaDB [(none)]> grant all privileges on nextcloud.* to 'nextcloud'@'localhost' identified by 'password';
Query OK, 0 rows affected (0.00 sec)

MariaDB [(none)]>flush privileges;

MariaDB [(none)]>quit;
Samba 4のインストール
Samba 4のインストールは「LIVAX Samba 4」を参照してください。
NextCloudインストール情報
以下の内容でセットアップしました。
| インストール先 | /home/nextcloud |
|---|---|
| データディレクトリ | /home/nextcloud/data |
| アプリケーションディレクトリ | /home/nextcloud/apps |
| 設定ファイル | /home/nextcloud/config/config.php |
| データベースタイプ | mysql |
| データベースサーバ | localhost |
| データベース名 | nextcloud |
| テーブルプレフィックス | oc_ |
| データベース管理ユーザ | nextcloud |
| データベース管理ユーザパスワード | password |
| データベース名 | nextcloud |
NextCloudの初期設定
ブラウザーからNextcloudのURL(https://cloud.example.com)にアクセスしてウィザードを起動します。
デフォルトではデータベースがsqliteになっていますのでmysqlへ変更して適切に値を入力してください。
config/config.php
※instanceid,passwordsalt,secretは伏字にしてあります。
<?php
$CONFIG = array (
  'instanceid' => 'aaaaaaaaaaa',
  'passwordsalt' => 'bbbbbbbbbbbbbbbbbbbbbbbbbbbb',
  'secret' => 'wwwwwwwwwwwwwwwwwwwwwwwwwwwww',
  'trusted_domains' =>
  array (
    0 => 'cloud.example.com',
    1 => '172.16.1.*',
  ),
  'datadirectory' => '/home/nextcloud/data',
  'overwrite.cli.url' => 'https://cloud.example.com',
  'dbtype' => 'mysql',
  'version' => '14.0.3.0',
  'dbname' => 'nextcloud',
  'dbhost' => 'localhost',
  'dbport' => '',
  'dbtableprefix' => 'oc_',
  'mysql.utf8mb4' => true,
  'dbuser' => 'nextcloud',
  'dbpassword' => 'password',
  'installed' => true,
  'theme' => '',
  'loglevel' => 2,
  'maintenance' => false,
  'enable_previews' => true,
  'enabledPreviewProviders' =>
  array (
    0 => 'OC\Preview\Image',
    1 => 'OC\Preview\MP3',
    2 => 'OC\Preview\TXT',
    3 => 'OC\Preview\PDF',
    4 => 'OC\Preview\Movie',
    5 => 'OC\Preview\Photoshop',
    6 => 'OC\Preview\TIFF',
    7 => 'OC\Preview\SVG',
    8 => 'OC\Preview\OpenDocument',
  ),
);
セットアップが完了すれば、/home/nextcloud/config/config.phpに設定が保存されています。
信頼できるドメイン、アプリ設定などを追加で記述してあります。
.user.ini
smbclientがエラーになるためallow_url_fopen=Onにしています。
※upload_max_filesizeなど511Mという中途半端にしているのはmemory_limitを512M以上にすると管理⇒概要のセキュリティ&セットアップ警告にメッセージが出力されてしまうためです。
※upload_max_files≦post_max_size≦memory_limitという条件がありますので注意して下してください。
upload_max_filesize=511M
post_max_size=511M
memory_limit=511M
mbstring.func_overload=0
always_populate_raw_post_data=-1
default_charset='UTF-8'
output_buffering=0
allow_url_fopen=On
以下のフォルダーやファイルが重要なデータです。バージョンアップなどで上書きしないように注意が必要です。
- data
- apps
- config/config.php
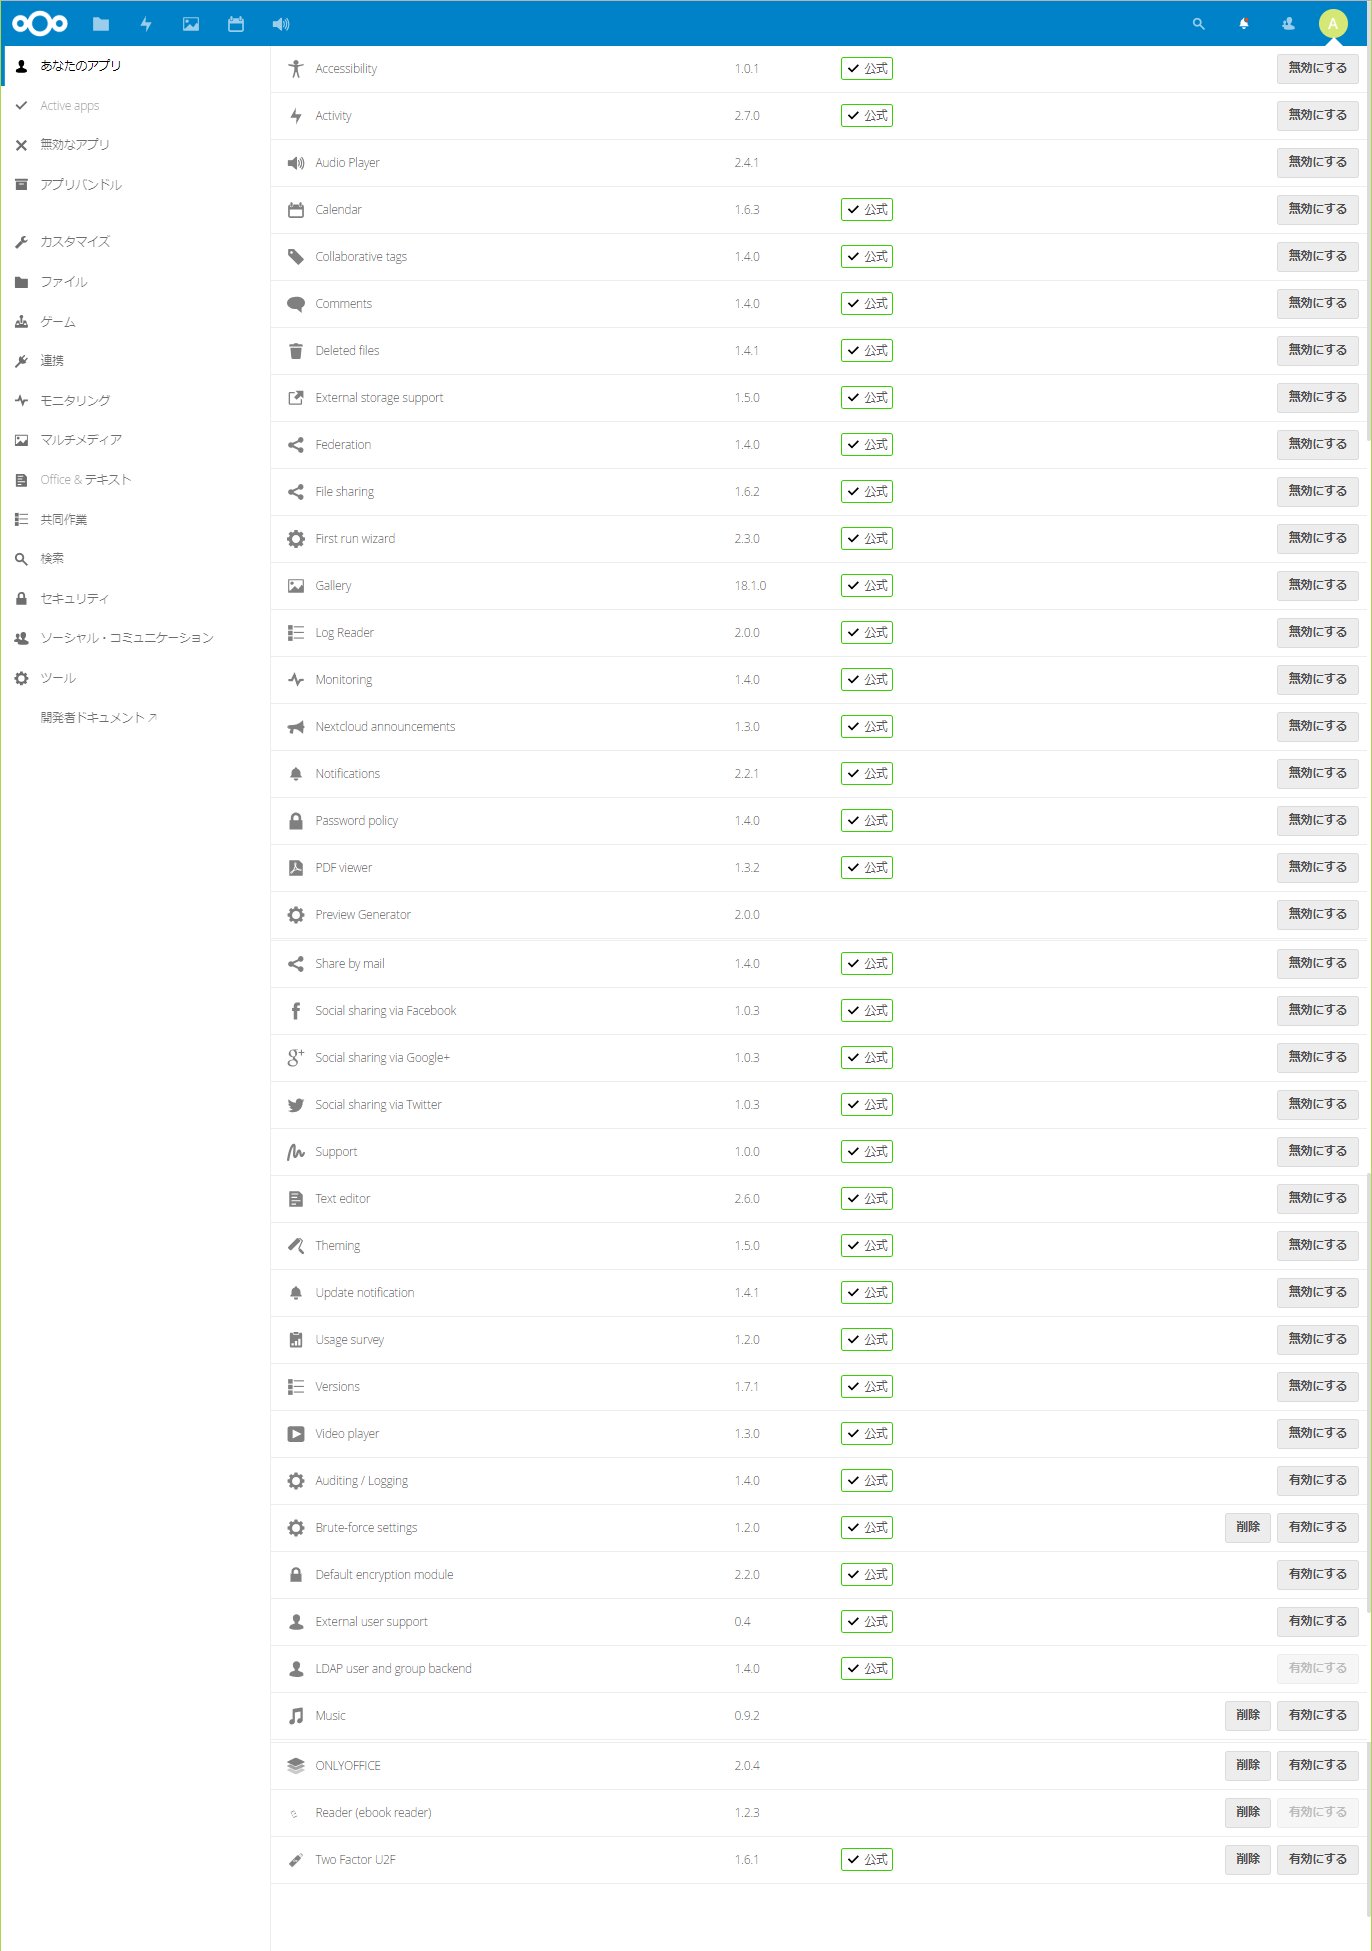
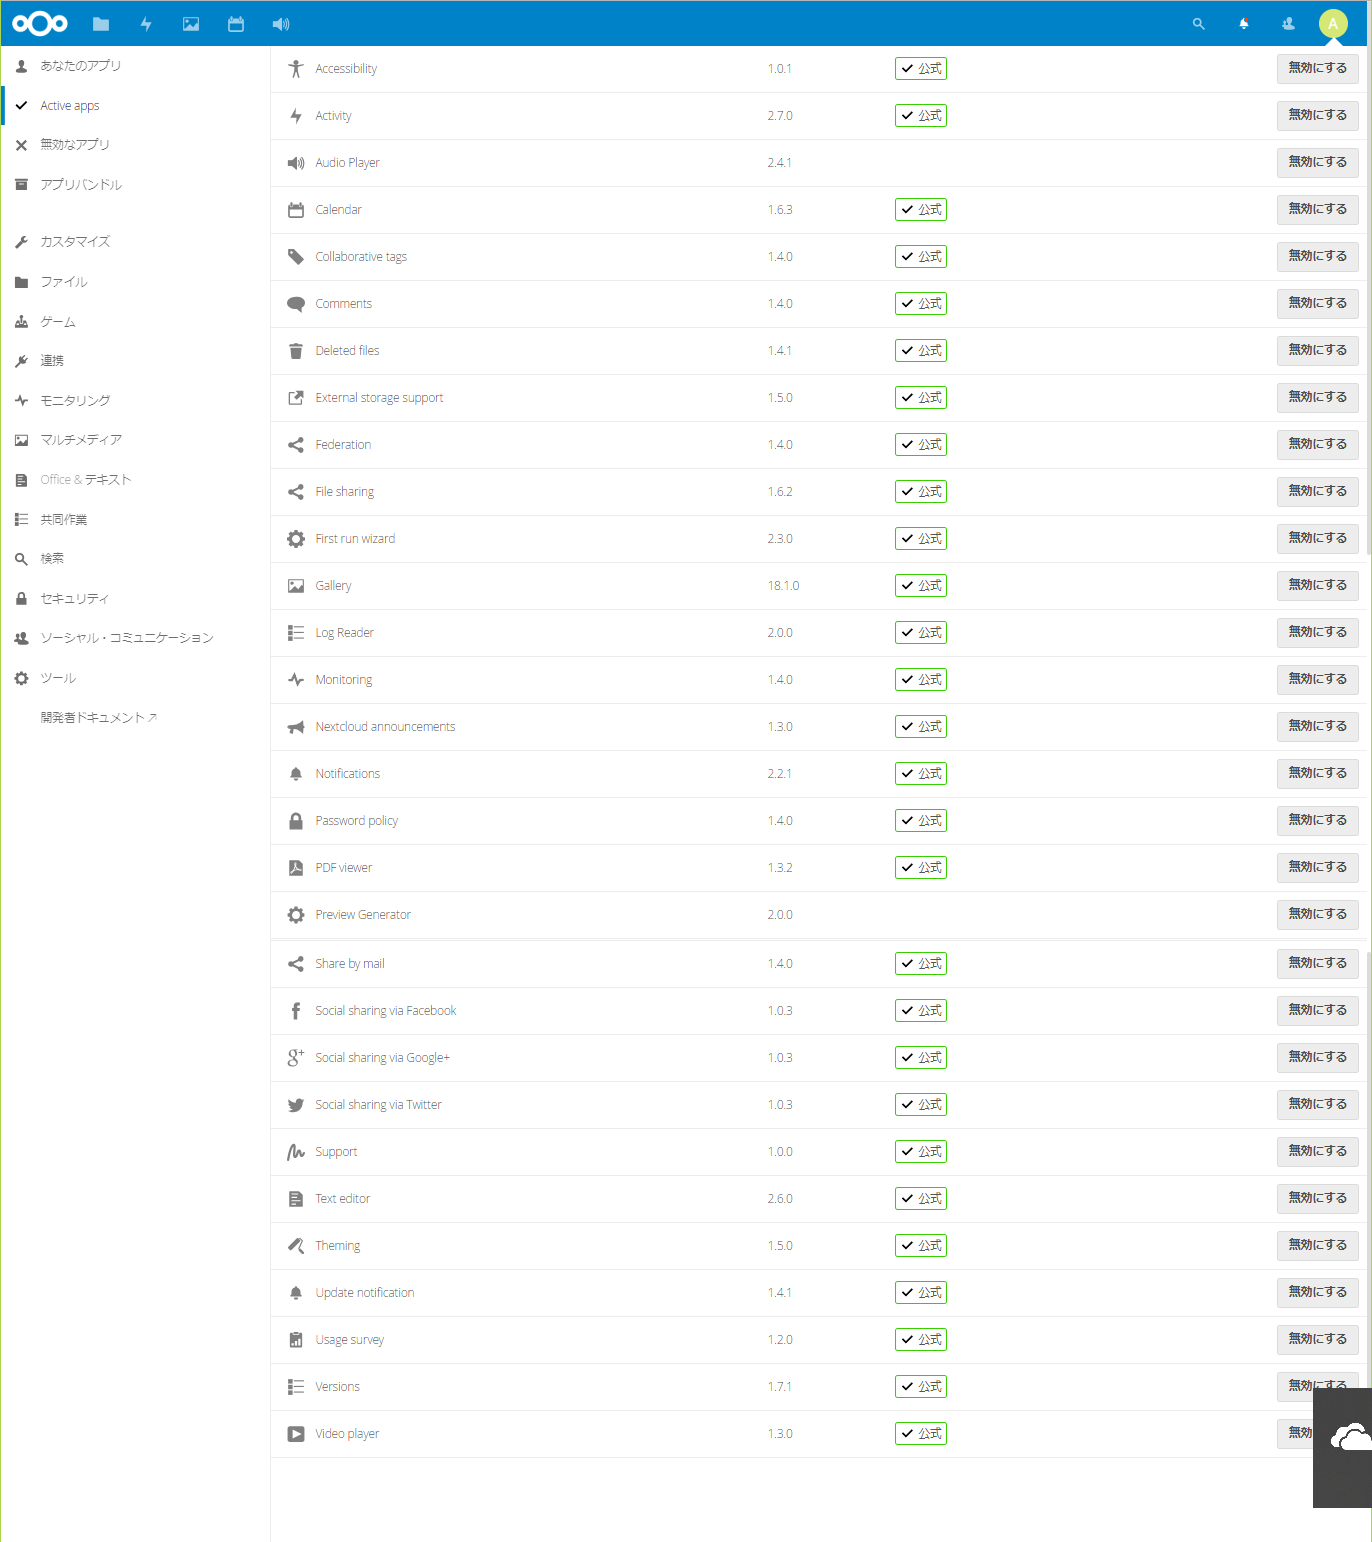
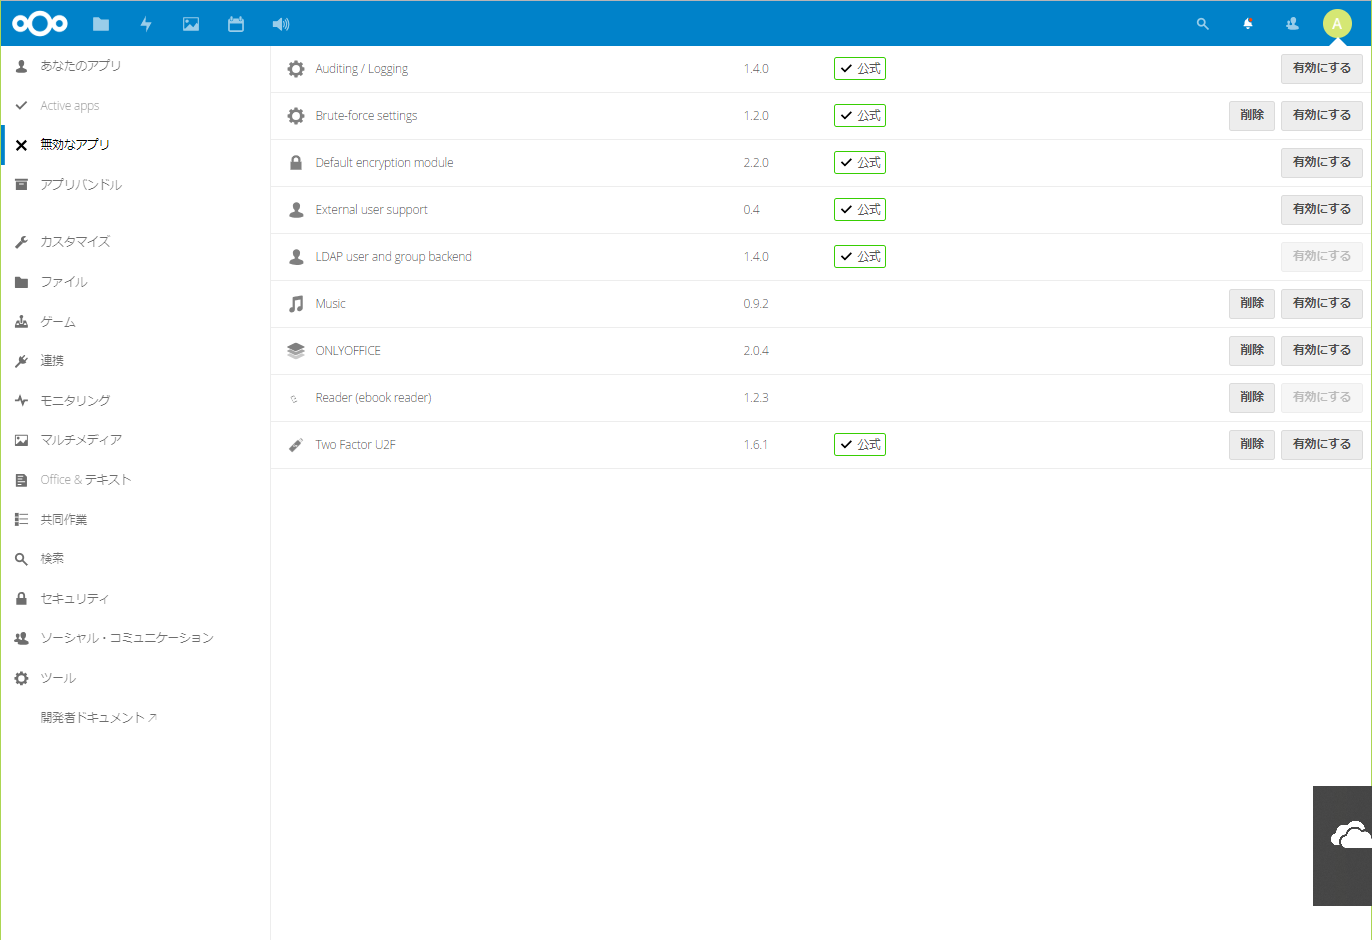
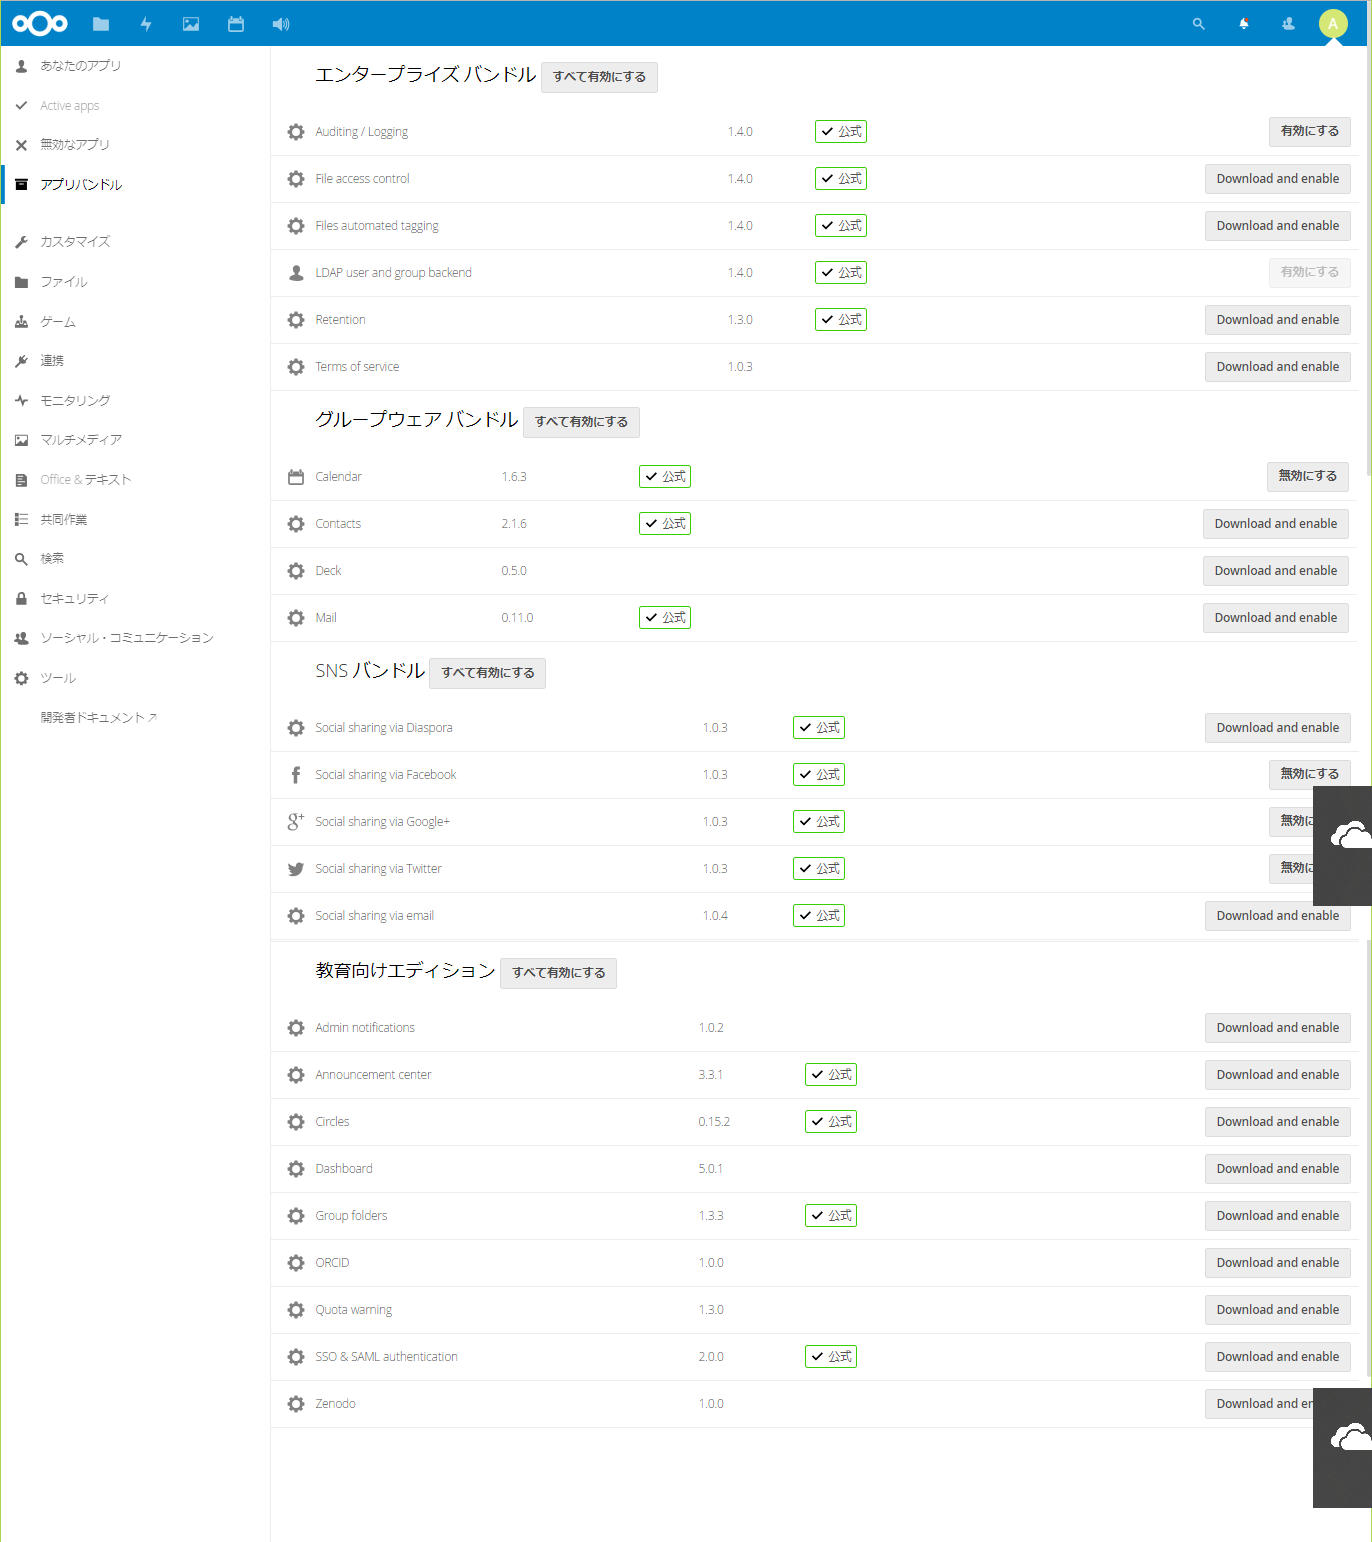
管理者ユーザでログインすれば、アプリの管理(追加、削除、有効化/無効化など)、ユーザの管理(追加、設定、削除)など行って使いやすいようにカスタマイズができます。
あなたのアプリ
Active Apps
無効なアプリ
アプリバンドル
※バージョンアップをした場合、手順では古いappsのフォルダーと新しいappsのフォルダーとを比較してないものがあれば古い方からコピーするようになっていたかと思います。
※ただし、互換性問題で動作しない場合などがあるため、一旦削除しダウンロードからやりなおすと利用できる場合があります。SNSバンドルがそうでした。
ピックアップ! SMTPサーバの設定
phpのmailはNextcloud 14.03ではもう使えないらしいので、メールで通知を送信したい場合は設定をしないければなりません。
SMTPサーバの設定をする前に、管理ユーザのメールアドレスの入力が前提条件です。
今回はGoogleのGmailを使います。
Googleはセキュリティの観点から2段階認証を推奨しています。
2段階認証を有効にしている場合、アプリケーションパスワードを生成して対応します。
アプリケーションパスワードの生成
- アプリパスワード生成のページへアクセスします。[メール設定をしたいGoogleアカウントでログインしてください]
- [アプリを選択] をクリックし、使用するアプリを選択します。[メールを選択しました]
- [端末を選択] をクリックし、使用する端末を選択します。[Windowsパソコンを選択しました]
- [生成] を選択します。
- 生成されたアプリ パスワード(黄色のバー内の 16 文字のコード)をパスワードとして使用します。
- [完了] を選択すれば生成されたアプリパスワードの画面は消えてしまいます。これはメールのパスワードで使用するパスフレーズです。
画面を閉じると再表示できませんので再生成してください。
管理ユーザのメールアドレス登録
- 画面一番左上のアイコンからメニューを表示し[設定]をクリックします。
- 画面中央上のメール欄に使用するメールアドレスを入力します。
- 保存は自動で行われます。
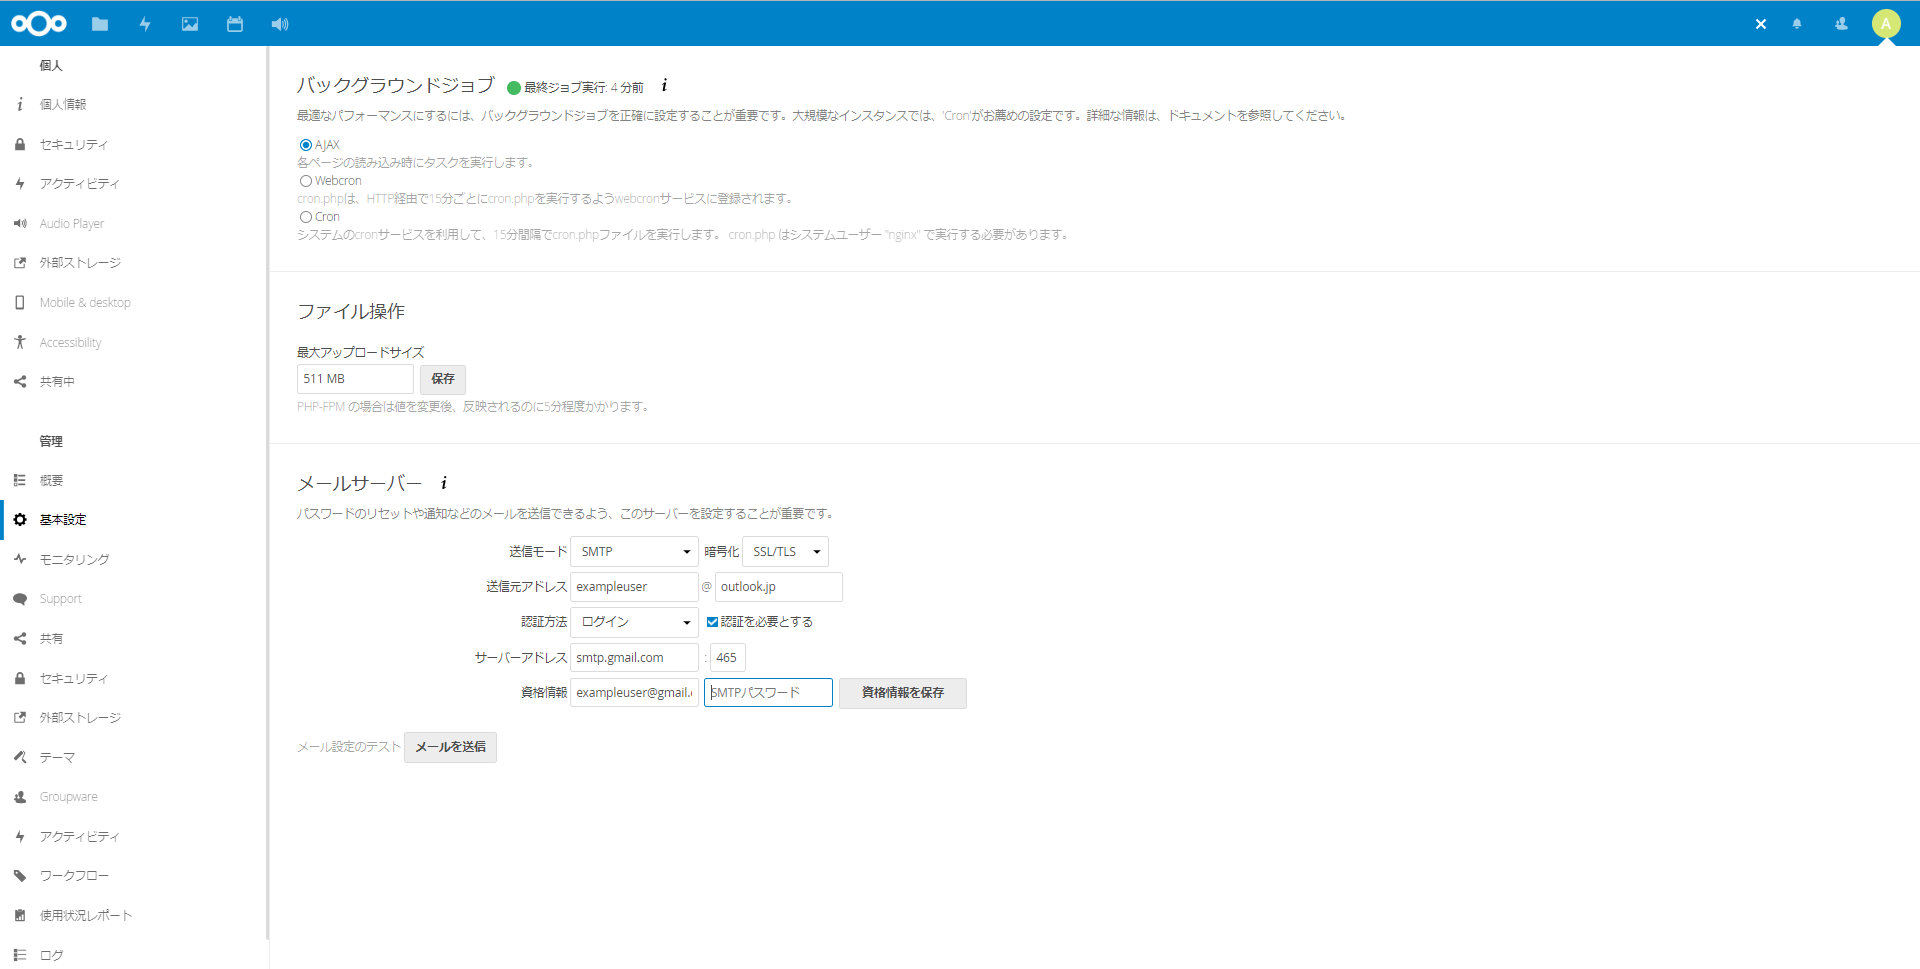
SMTPサーバの設定
送信元アドレスとGmailアドレスが別で、Gmailの設定が以下の場合で説明します。
※説明用のため動作しません。実際の値に変更してください。
| 送信メールアドレス | exampleuser@outlook.jp |
|---|---|
| Gmailアドレス | exampleuser@gmail.com |
| 転送 | admin@example.comに転送してGメールを受信トレイに残す |
| POPダウンロード | すべてのメールに対してPOPが有効 |
| IMAPアクセス | IMAP無効 |
| 2段階認証プロセス | 有効 |
| アプリケーションパスワード | zw4NNMR6s8ZCF99S |
実際の設定値は以下になります。
※送信サーバの設定ですのでSMTPです。受信サーバ(POPではありません)
※SSL/TLSの場合のTCPポート番号が465、STARTTLSの場合のTCPポート番号が587です。
※SMTPパスワードと表示されている欄にアプリケーションパスワードを入力します。
※項目を入力していると時間経過で認証画面が表示されますが、これはNextcloudのユーザの認証画面です。今作業しているユーザのパスワードを入力してください。
config/config.php(SMTPサーバ設定のみ抜粋)
  'mail_smtpmode' => 'smtp',
  'mail_smtphost' => 'smtp.gmail.com',
  'mail_smtpport' => '465',
  'mail_smtpauthtype' => 'LOGIN',
  'mail_smtpauth' => 1,
  'mail_smtpname' => 'exampleuser@gmail.com',
  'mail_smtppassword' => 'zw4NNMR6s8ZCF99S',
  'mail_from_address' => 'exampleuser',
  'mail_domain' => 'outlook.jp',
  'mail_smtpsecure' => 'ssl',
使用例
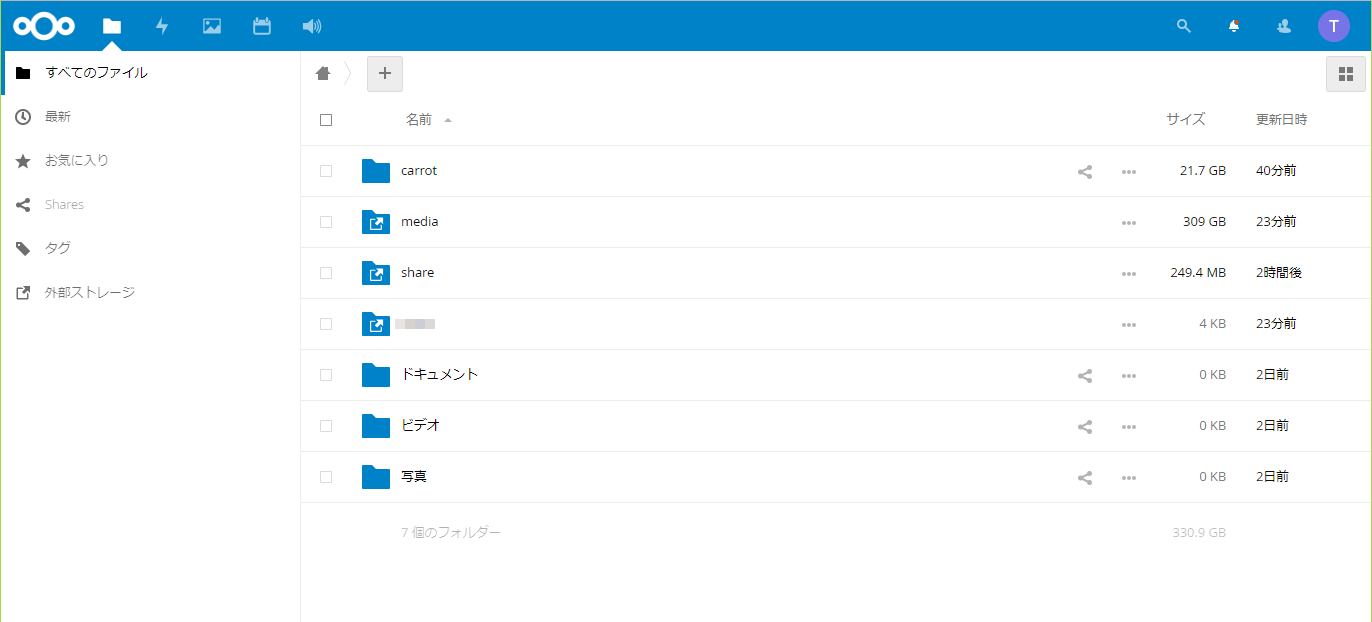
ウェブブラウザーからNextcloudにログインした状態の画面です。
上段のアイコンは、左から「NextCloudホーム」、「すべてのフォルダー」、「アクティビティ」、「ギャラリー」、「カレンダー」、「AudioPlayer」、「検索」、「通知」、「連絡先」、「メニュー」の順で並んでいます。
外部ストレージ設定によりSambaで共有しているフォルダ(media、share、ユーザホーム)に接続できています。
また、後で紹介するWindowsクライアントアプリで同期設定したフォルダ(carrot)が存在しています。
デバイスとの連携
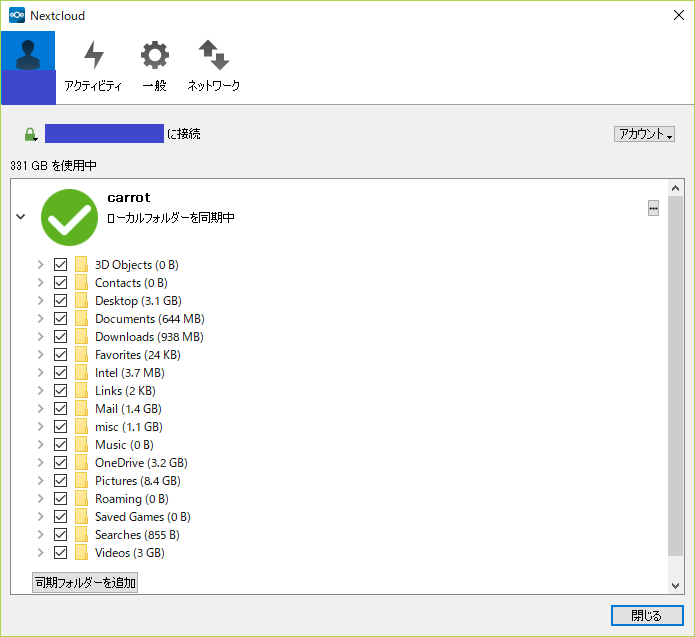
Windows PCやスマホやタブレットなど他のデバイスとの連携にクライアントアプリが提供されています。
Windows 10にインストールして、ユーザディレクトリ以下を同期させて使用しています。
OneDriveのフォルダーも含まれるため、一応、これだけでスマホなどとも連携が可能です。
総容量21GBを同期させているため初回設定時には非常に時間がかかりましたが、自動同期は非常に軽く動作しています。
ちなみにスマホ用のアプリの方はいまいち使用方法がわからず連携ができていません。
おそらくまだBeta版でフル機能は動作していないのだと思います。
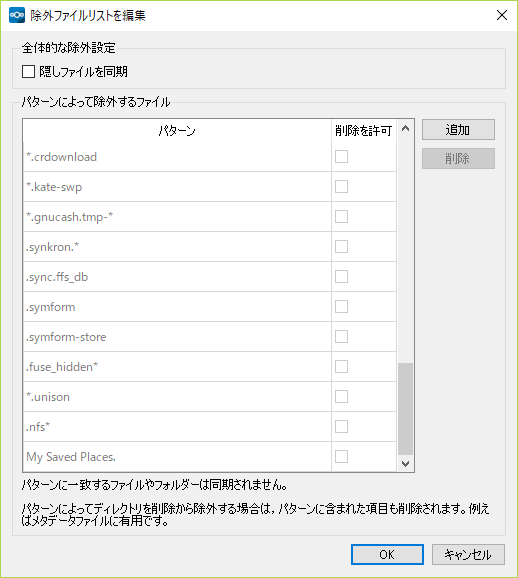
同期の除外リスト
同期させたくないファイルの種類が事前に登録されています。
追加削除が可能なので自由に設定変更が可能です。
以上、NextCloudの構築でした。
これらの環境はdockerとdocker-composerで簡単に構築できます。これについてはまた別の機会に記載します。
[common_content id=”13589″]


